Saturday, March 29, 2025

Engine Mounting Part Six!

Purchased this EarthX recommended charger to take care of the new lithium battery.  Pricey critter!


Connected the fuel supply and return lines.


They have you shove this heat shield up under the ignition coils.

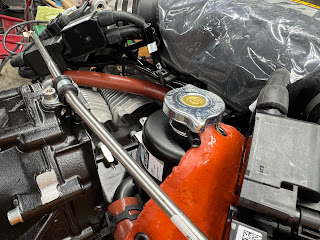
And then safety wire it to this hose.

Next is to secure this heat shield in place with safety wire around the coolant distributor neck.


Numbered totally different that what the directions call out.

Unfortunately the wires are not labeled per the KAI's.  I had to use a multimeter to figure out which was the correct ground on the other end.

Next they have you cut the ground wire for the starter solenoid off and cover it with heat shrink.

They have you connect all of the sensor ground wires to the ground lugs on the fuse box.

They have you temp mount the engine fuse box.  


Seems they have changed from having two of the same connectors that are a different color to two totally different styles.  One is now a cannon plug.

Monday, March 24, 2025

Engine mount part five!

I then swung my hanging straps around 90 degrees and pulled the fuse up close to the engine.  This allowed me to align the engine perfectly and get the bolts and isolators installed.  I did put a little bit of silicone lube on the isolators to get them to slide together easily.  I installed the bottom bolts first.


Then the top ones.  It is a tight fit on the top.  

I then torqued down the bolts per the KAI's.
Looks great hanging on the plane.  It is amazing how compact this engine is!


Sunday, March 23, 2025

Engine mount part four!

You will need a long ball end 8mm allen key to get to the top left mount bolt.  You have to look up the torque spec in the Rotax maintenance manual.  That manual also calls out that the bolts must have medium loctite when installed.


Then you are asked to reconnect the lower coolant lines.

Once that is done there is a procedure to match drill up to full size the lower engine mount bolt holes.  Easy peasy just follow the KAI's.