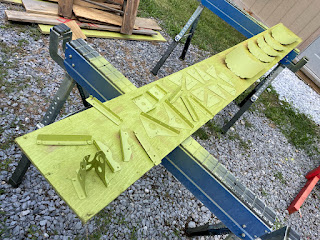
Had to perform some brake jobs on two of the family's motor pool today so no airplane work. I am pooped.
Saturday, September 23, 2023
Thursday, September 21, 2023
Fuselage center section #42 - Installing aft bulkhead and bottom skin
> 4000 rivets pulled and ~ 8000 more to go!
Next was like 28 nutplates for the floorboards that go under the knees. This is what you step on when entering the airplane.
Came up with this trick to prevent damage to the skins in these tight places... Using the angle tool to pull these along with this squeegee worked out great!
Oops, one more nutplate that gets installed with pulled rivets. Used a stick magnet to get them into position and a cleco to hold them. My fat fingers could not get to em from the holes in the ribs.
Wednesday, September 20, 2023
Fuselage center section #41 - Installing aft bulkhead and bottom skin
Tonight I installed the aft bulkhead, fuel valve bracket and AP servo bracket. Then moved on to the bottom skin. My goal is to not finish the bottom skin install until after I have flared the fuel lines that go in the center below the knee floor boards. This breaks from the order of install per the KAI's. If I am successful, I won't need a special flaring tool that can work in such tight spaces.
Got started by riveting the nutplates and the fuel valve bracket to the aft bulkhead.
Then this gets riveted to the two center ribs but not the outside ones. Also installed the AP brackets at the same time.
Then I installed the snap bushings in the aft bulkhead.
Noticed this deformed or damaged nutplate. Scratch one! Glad I noticed it before riveting it to the skin!
Nutplates and bracket installed on the bottom skin. These were a pain due to the large skin and trying to do three things at once.
Then I installed these screws and all metal locknuts. These are what ends up holding the plastic blocks that secure and orient the fuel lines. Funny thing is that you need a 7/32 wrench for these nuts and that is not a common wrench in most sets. I have a ton of tools though and found one. I did not have a 7/32 deep well socket. I think I let my 7/32 stuff walk off with the RV7 I sold.
Riveted the area around the center channel first along with these gussets and the reinforcement brackets that go under the skin. This starts to really stiffen the whole lower fuse assembly up!
Tuesday, September 19, 2023
Fuselage center section #40 - fuse bottom corner skin install
Riveted the fuse bottom corner skins tonight. Many short sections on each side to make all the compound curves.
The aft ones get these nutplates.Monday, September 18, 2023
Sunday, September 17, 2023
Fuselage center section #38 - bottom side part acid washing and scrubbing
Acid washed and scrubbed all the parts I have ready to assemble.
Subscribe to:
Comments (Atom)


