Saturday, August 17, 2024

Tire mounting part 2 and upper engine mount

 More work on mounting the tubes and tires.

These are pretty nice.  Have no idea why people feel the need to spend big bucks on the premium option available.
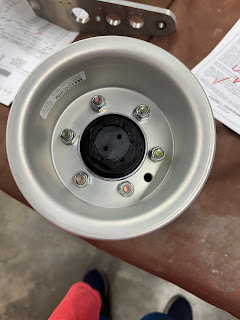
Have to pull them apart and split the rims.

Took several photos as I deconstructed them to ensure I get them back together properly.

These are made different than what came with my RV-7.  The axle is also provided and not integral to the gear leg.

Way back when I built my RV-7 for some weird reason I stuck this sticker that came with the tires on one of my water spigot pipes.  

I decided to stick one from the RV-12 on the other pipe!  LOL 

Here we are all back together.

I really like how the valve stem is routed on these wheels.  Much better than the RV-7 was.  To get it in place the center hub must be removed to make room.

Also be aware that the way these things are put together, the bolts produce some really fine slivers of metal shavings.  Watch out for those and vacuum them up as they may result in a flat later!

Tire and wheels ready to go!

Next they have you enlarge the holes for the upper engine mount extension.  This is done in two steps.  Be careful with the drill motor, if the bit catches, it will jerk and try to spin around!

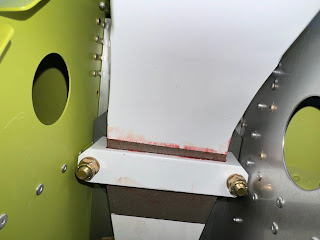
Mine aligned perfectly without any fuss!  Did have to remove a bit of sealant to keep the surface flush.

Use this trick to get to the nut for torqueing!


Friday, August 16, 2024

Tire mounting part 1

Got started mounting the tubes/tires on the wheels today.

New to me is this wheel that goes in the front.  It has to be spit apart to install the tube and tire.

Van's has you remove these nuts and washers from the tubes.  Other than the cap, they are not used.

I purchased some real tire talc for dusting the tubes and inside the tire.  In the past I used baby powder but it is no longer made with talc.  I wanted the real stuff.

This stuff gets everywhere and can cause cancer if you breath enough of it.  Wear a mask!

Nose wheel done!


Wednesday, August 14, 2024

Main gear leg mounting part 3.

Got one main gear leg mounted last night.  Not easy to reach in there and get all the parts to align.  The outboard clamp and the leg must go in and up together and the clamp wants to bind up on the long bolts.  The inboard stack up of shims and the clamp block are a challenge to get all in the right place at the same time to be able to insert the bolts.  

There is a correct orientation for this spacer block.  The radiused edge goes down and the chamfered edge goes up.
This block must go up evenly.  Be careful not to get it into a bind.  Hard to believe that this is all that keeps the gear leg from folding up.  The red stuff is grease I put on all the bare steel surfaces to prevent rust.


One down one to go!


Tuesday, August 13, 2024

Main gear leg mounting part 2.

Got the wear pads installed on the other side tonight.  


Tight quarters here.....If you don't install these rivets per the KAI's, this will most likely be an issue.


Monday, August 12, 2024

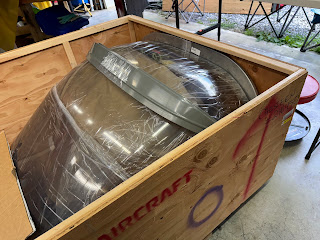
Finished the Finish Kit Inventory

 Finished the finish kit inventory.  Was only missing a few nutplates and some AN fittings.


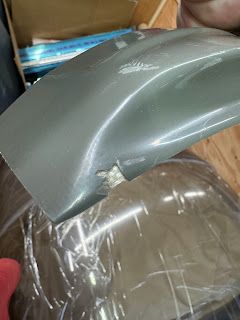
The glare shield fairing has a crack/chip out of the gel coat.  Van's says just fix it when I paint it.
Yes I can do that but I paid almost $200 for this option and I expect a part that is not damaged.   I mean I am already had to pay over 35% more for the kit than what I agreed to when I ordered it and now I am told I have to accept a damaged part.