Saturday, June 15, 2024

Wings part 40

Got started on the flaperons today.

Apparently in the past, Van's expected the builder to whittle these parts out of various extrusions.  I remember doing similar types of task when I built my 7 and parts of the 10.  Old builders try not to be too upset that Van's now provides these parts pre-manufactured and beautifully anodized.  They even tap the holes for the hinge bearings!

The KAI's state to flute these tip ribs to get them as flat as you can.  These guys take some serious flutes....  You can't get them perfect and the plans state to just do the best you can.

These other ribs do not need as much of a flute.

There are allot of lefts and rights on these so be careful to keep it all straight.  It would be easy to screw it up.  

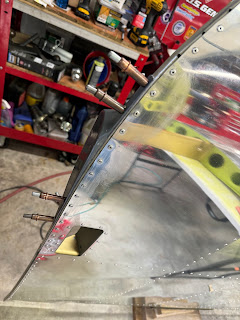
These outboard nose skins need to be match drilled to the stainless counterweight pipe.  This requires a good drill bit and some lube.  Don't overheat the bit or the pipe as stainess can become almost impossible to drill if you do.  Take your time and find the right speed to keep the bit cutting.

Also be aware that this nose skin has a hole in the bottom that must align with the bracket for the hinge bearing.  It would be easy to get the wrong skin on the wrong flaperon.

Match drilling the other side.

Then they have you take it all apart, deburr and then rivet the ribs to the counterweight using the two holes that were just drilled in the pipe.  You must bend the flange a little on these ribs to get the rivet puller in there.  I also squirted a little primer on matching surfaces to help prevent dissimilar metal corrosion.  I will prime the whole thing later in the process.

Other side done.

Then they have you put it all back together and match drill the nose skin to the counterweight.  Be careful to align the drill so that the bit does not walk...

Then they have you match drill the remaining holes on the ribs to the nose skin.

Wings part 39

Finished up the NAV/Strobe light fairings.

AeroLED is now sending these upgraded connectors vs the cheap Mollex plugs.

I applied the pro-seal to the mounting faces of the fairings and then riveted them onto the wingtip.

All done and the mess cleaned up.  During paint, a finishing bead of sealant will be applied to finish the look.


Monday, June 10, 2024

Wings part 38

Got started on the NAV/Strobe mounts.

They have you trim these to the scribe lines.  The lines sort of vanish near the hand hold.  Then match drill two holes on the front and aft outboard faces.  This part is not the best quality or fit to the shape of the wing tip.  There is a gap on the front and aft edge where it sits against the outboard rib of the tip.

Then they have you drill the remaining holes on the bottom.  The three of them must align with existing holes.  They don't gel coat those areas so you can see the hole thru the glass.  Unfortunately they sort of missed the area where the holes are.


Then they have you apply some epoxy and flock to the inside of the outboard face of the mount.  This fills the gap that would be there so the rivets don't squish the mount.  I also used it to fill the gap that was on the front and rear that you can see here.  Before doing this, I applied car wax to the areas that will see the epoxy.  It worked great as I was able to pop them off after curing.

Did the same for the left wing.

This one fit much better on the front and rear flange.


Sunday, June 9, 2024

Wings part 37

Finished riveting on the left wing tip skins.


This thing ends up with multiple complex curves.

Amazing how those tabs align and the holes all match!