Saturday, April 8, 2023

Anti-Servo Tab Prep Part 1

 Anti-servo tab prep - 1.25 Man Hours

All the parts for the anti-servo tabs that stabilize and trim the stabilator.

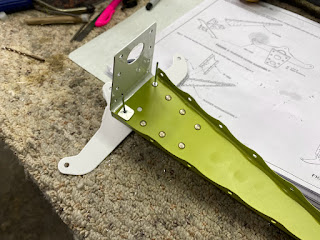
Insert the ribs in the correct location along with the front spars.

Match drill the root rib with the skin and the front spar.

Match drill the aft hole in all the ribs with the skin.

Measure the hinge for length.
32.5" marked.

Easy to cut with the band saw.

Clamping the steel drilling guide to the hinge.

There are specific directions on what holes to drill using the drill guide.

Use plenty of clamps to ensure this thing stays straight.

Drill and cleco.... Rinse repeat many times.

Nicely drilled and accurate holes!


Friday, April 7, 2023

Rudder Part 2

Priming day for the rudder parts.  - 6.8 man hours

Scrubbed and acid etched all the rudder parts today.

Hung them up to dry.

Primed all the interior parts.

The EkoPoxy is working out great!

Ready for assembly a few hours later.

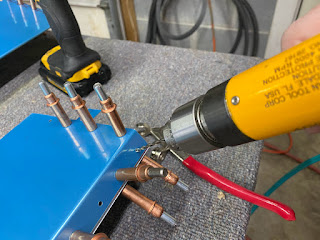
The rib at the upper hinge gets riveted to the spar and spar caps.

Used the squeezer for all these rivets.

Next the rivets for the hinge brackets get riveted to the spar caps and the spar.

Then the spar caps get riveted to the rear spar.  All of these are solid round head rivets.  I put the manufactured head on the thinner material unless otherwise specified.

All done!

The rear side.

Next the rib gets riveted to the rudder horn weldment.

Due to the angle of the horn, blind rivets are called out for the two closest to the flange of the horn.  It took all my strength not to put solid rivets in here because I have the yokes that could do it.  Van's has the builder use blind here.  Since I am going E-SLA, I can't just do my own thing....

Next the horn gets riveted to the aft spar.

Manufactured head rivets on the thinner material.

Had to switch to one of my modified yokes from past projects to get these close to the flange.  Due to the angles, the longeron yoke won't work.

Next the remaining ribs get riveted on the spar.

These get blind rivets.

Next the stub spar gets riveted in.  Pay attention to the orientation.

And then the skeleton is cleco'ed into the skin.

Rivets

Rivets

All done!

Then the front skin overlaps get closed up.

Riveting done...

The trim tab gets riveted.  Apparently this used to be optional.  Now it is standard.

Finished product!

Thursday, April 6, 2023

Rudder Prep Part 1

On to the rudder - 3.8 man hours

Cutting the hinges apart.

Removing the left overs.

Cutting the spar caps appart.

Removing the left overs.

Measuring the centerline.

Marking the centerline.

Yep, that is the centerline.

Final reaming the #30 holes.

Final reaming the #12 holes.

Deburring the rear spar.

Deburring the rear spar holes.

Clamping the rear spar caps.

Match drilling the spar caps.

All clamped and match drilled.

Final reaming the #30 holes in the ruder horn.

Final reaming the #12 holes in the rudder horn,

Match drilling the horn to the rear spar.

Match drilling the hinge brackets to the rear spar and spar caps.

Cutting the rib flange per the directions.


Used the band saw to remove the flange of one of the ribs.

Deburred the rib edge.

Rudder skin also has one of these tabs that must be removed.

Used the snips to cut it off.]

This left these nubs that must be removed.  I used a file to remove them and smooth the edge of the skin.


 Blue film therapy (as Smitty would say).

Deburring the rudder skin.

Deburring the rudder skin holes.  Used my blind hole deburr tool to get both sides at the same time.