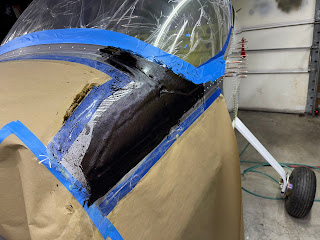
Layed up the fiberglass for the canopy frame arms.
First layer was wetted out with black tinted resin. I then let that layer gel up to tacky before applying and wetting out the remaining 4 layers with clear resin.Saturday, November 23, 2024
Monday, November 18, 2024
Canopy Fairing Part 5
Then I used the provided final trim template to layout the path for the electrical tape layers that will form the edge of the canopy fairing to plexiglass transition.
I used red high quality 3M tape for the first layer.
I then proceeded to cut out the glass for the 5 layers on each side that will cover the canopy frame arms.
I used a rotary fabric cutting knife and a piece of 2'X4' luan plywood as a cutting surface. It took me some time to relearn how to deal with this fiberglass cloth. It is very easy to shift the fibers and end up with something that does not look anything like what you cut out. It is also easy to have the edges start to unravel and end up with a fuzzy mess.
Sunday, November 17, 2024
Canopy Fairing Part 4
Next I used the scraps of foam and some other rigid foam I had to form fillers for the gaps above and below the canopy frame arms.
Subscribe to:
Comments (Atom)


