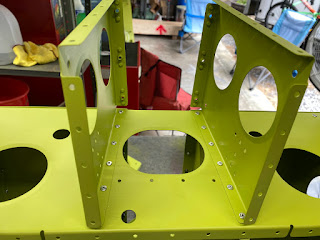
Finished up riveting all the baggage area parts to date. Also assembled a couple of sub assemblies that go in the area between the seat ribs.
Using those circle dots to cover the machined recesses for the bearings worked great. Primer in here makes it very hard to insert the bearings.A couple of the nutplate rivets can't be squeezed so they have you install them with the nutplate rivets that get pulled.
And then I installed the nutplates that get squeezed rivets. The one in the corner has to be squeezed by inserting the yoke in the access hole.
Next I riveted the fabricated angles to this little plate. I don't know what this guy does yet but I am sure I will find out.
Next I riveted these bearing brackets onto the ribs. They get two different kinds of pulled rivets. Be careful here to use the correct ones. The flush rivets go against the web of the rib,
And then this one hole gets a nutplate. Not sure why there is two holes but the KAI says on the one side gets one.
And using the hardware called out in the KAI, I put this thing together. I had to do some work to the aluminum tubes as they were too long from the factory. I put them in the drill press and push them down on some coarse sandpaper to sand them down nicely. This keeps them nice and square on the end and allows for some micro machining tolerances. Just keep checking them with a set of calipers because if you go too far, the tube is scrap! Also don't forget to grease the washers and bolts per the KAI. Washer wrenches are your friend for stuff like this! Keep making sure you are following the figures in the KAI closely and comparing what you are building with the drawings. It would be easy to screw this thing up.


