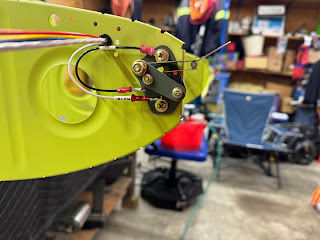
Been working on getting the wings ready to skin. This includes installing the wiring harnesses and the wing root connectors as well as the stall warning vane switch.
I did the right wing first since this is the one that was on the table. They have you install this wiring harness by first removing a couple of snap bushings. Ensure you have the correct harness on the correct wing. The right wing has female pin sockets on this blue connector and also has one less wire than the left. Use Loctite on the screws for the standoffs. Also ensure you clean the primer off of the area where the ground screw attaches. The #4 washers come in two thicknesses so be sure you measure them to be sure you have the correct ones. The orientation of this blue connector is important. Make sure the bigger slot is on the bottom of the wing.Feed the wires thru all the ribs. The multi conductor cable goes all the way to the end. The other wires stop one bay in for the landing light.
Next I worked on the parts for the stall warning vane switch. These parts get some drilling, some countersinking and a ton of deburring. I then squirted some self etch primer on them since they are too small for a real primer batch.
Started installing the left wing harness. Here I have cleaned off the primer where the grounds go. This one has an extra wire for the stall vane switch. It came with the connector already crimped on which won't go thru the snap bushings. I cut it off and then crimped on a new one once the wire was installed.
Then I assembled the vane switch assembly. I followed the KAI's but had to change the washer stackup for the vane pivot shaft. I had to switch to thin washers to make it work properly.


No comments:
Post a Comment