Monday, October 7, 2024

Disaster!

Around Friday 9/27/24 hurricane Helene decided to pay East TN and Western NC a visit.  This resulted in the worst flood disaster in recorded history for the region.

3 major rivers flow through my county and converge into the Douglas Lake.  All three exceeded there record high levels by a large margin.

Downtown Newport was under 2-6 feet of flood water. 

All along the rivers homes were destroyed.  Bridges and roads were washed away.  People were and still are trapped.  Public water was wiped out, significant power outages occurred.  Two local dams were overrun and water spilled over the top of them at a rate up to three times the typical flow at Niagara Falls.  Their failure was imminent but God intervened and they held.  The East bound side of I-40 at the TN/NC line fell into the river below.  Entire communities like Hartford TN and Chimney Rock NC were completely wiped out.

At this point 2 people from my county are confirmed dead.  Neighboring counties and over in NC the death toll continues to rise and the numbers missing are huge.


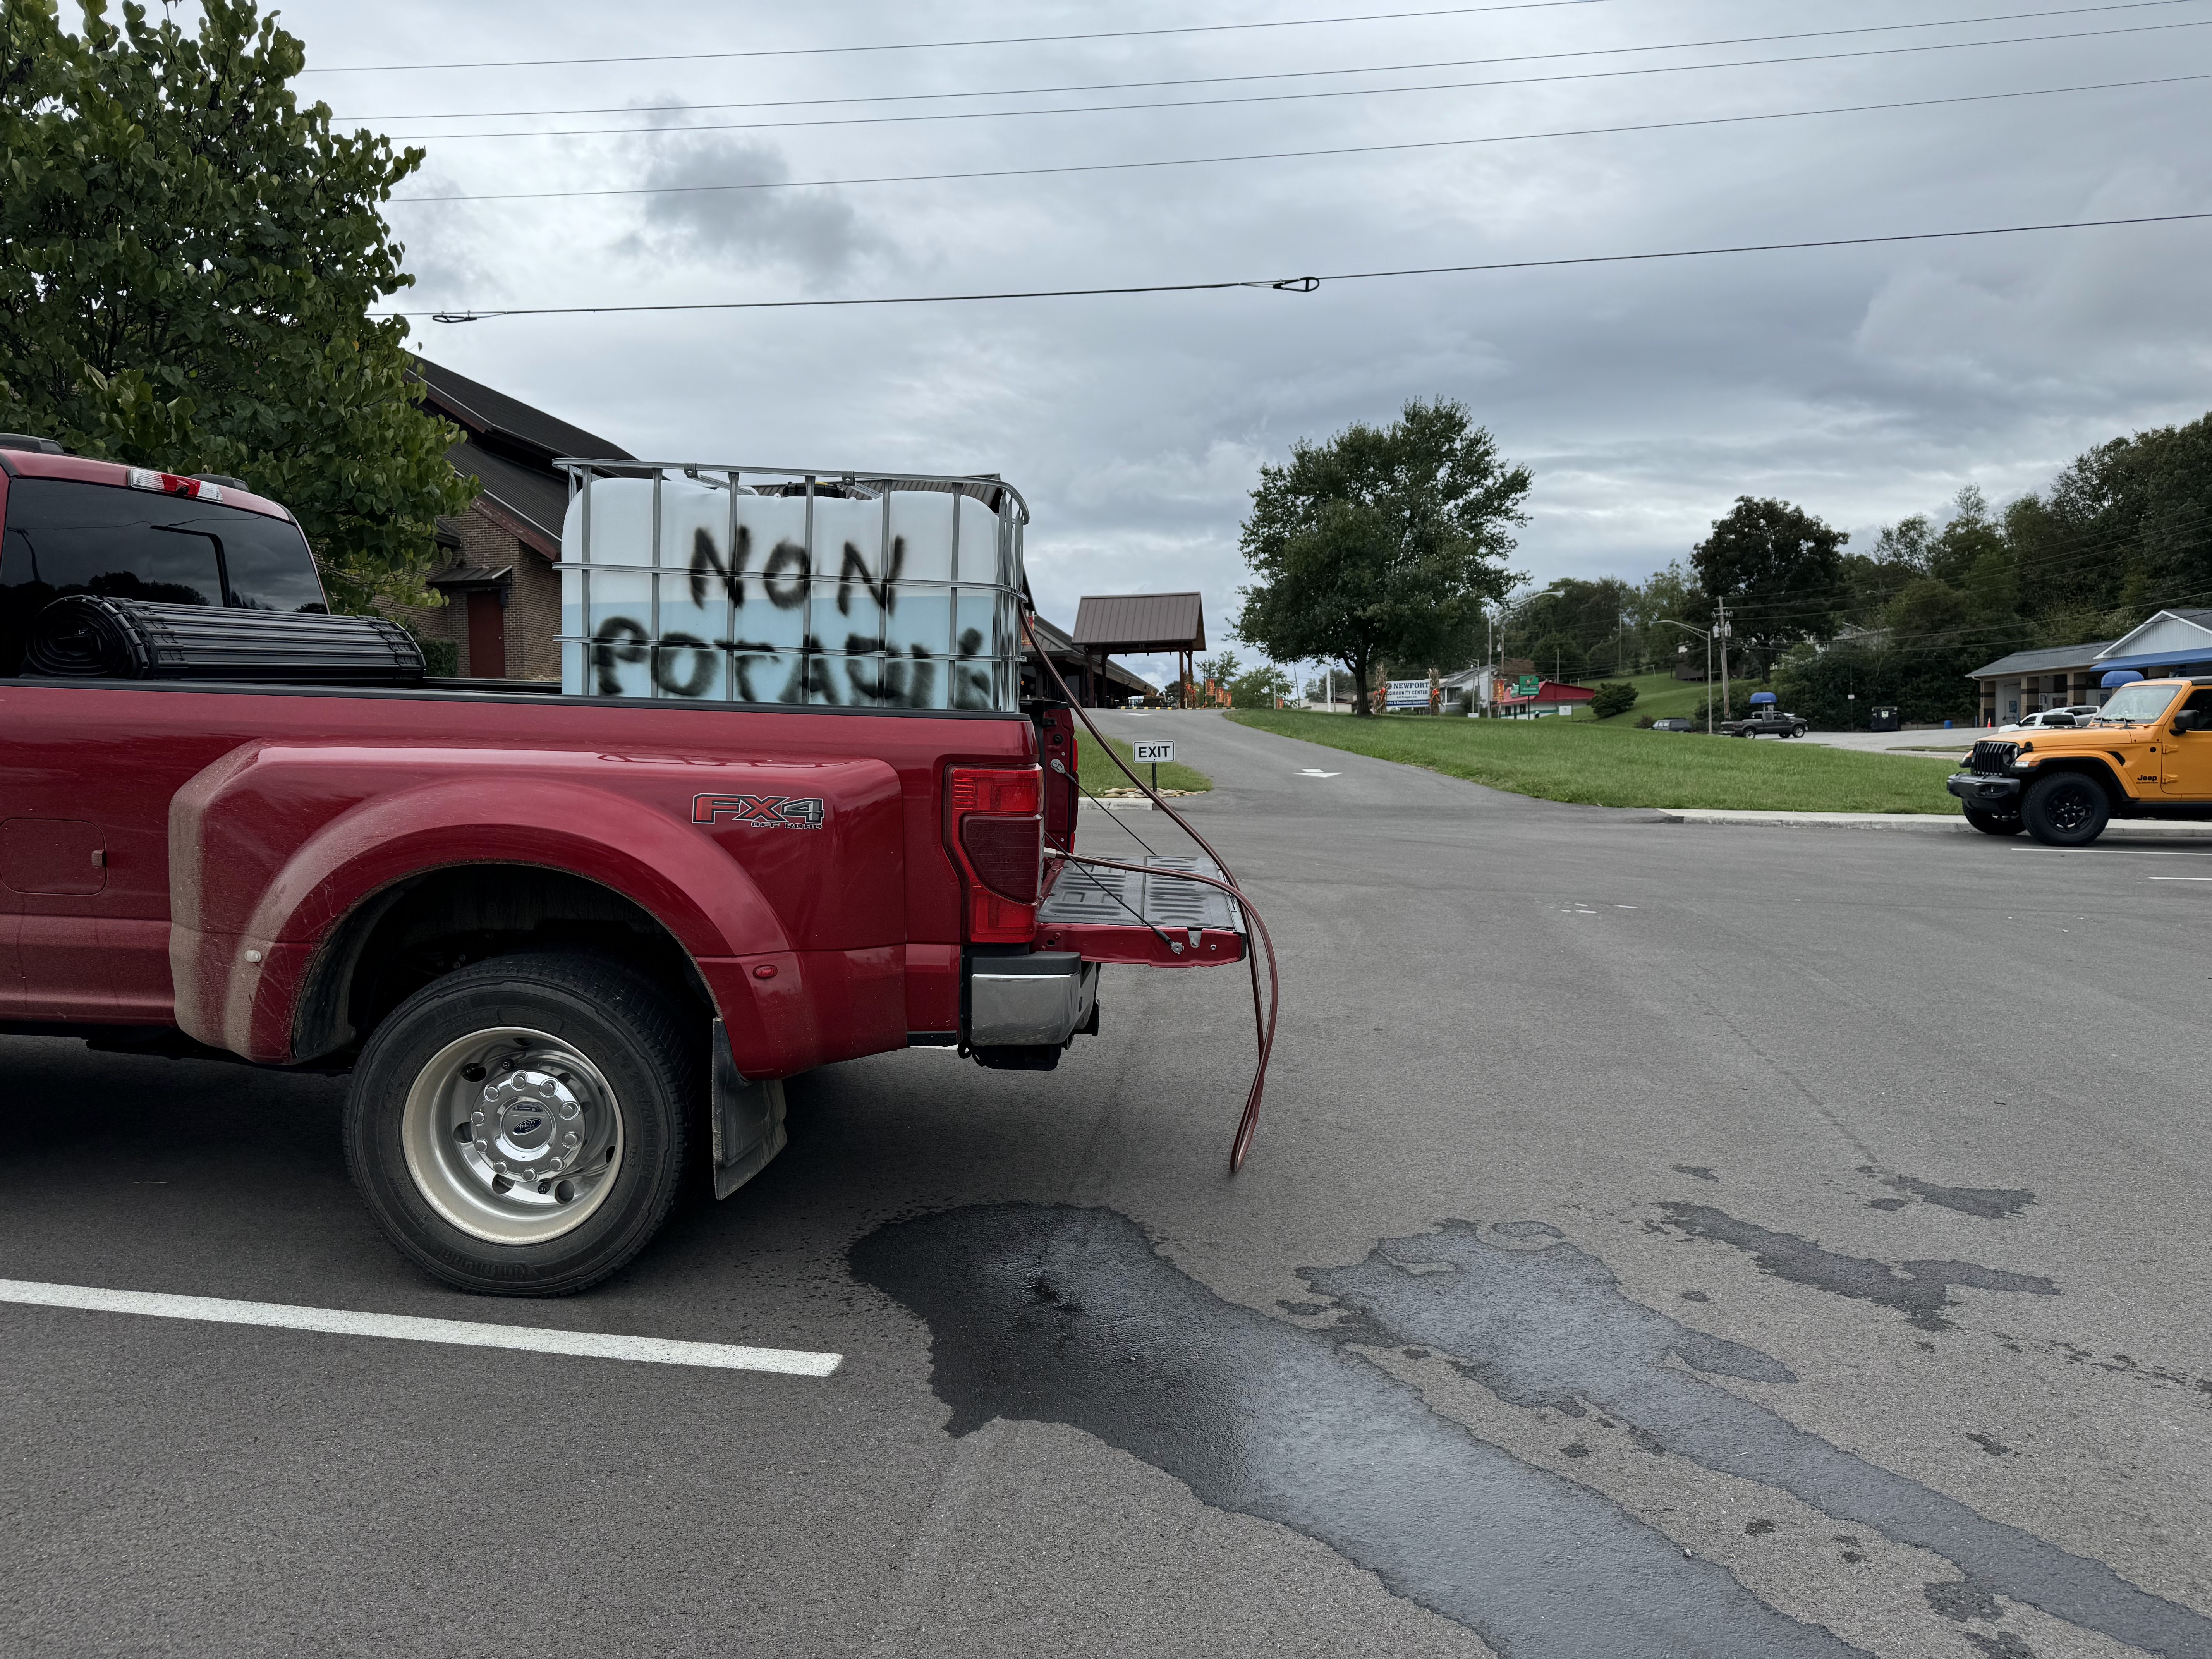
Since my work was unaffected and we have the ability to produce about 2 million gallons of potable water a day, I decided to grab a few totes and start delivering water to our town and county.  I spent the next 4 days doing just that.

Started with one tote.


Quickly decided I need to expand the operation to two totes.

Then enlisted the help of a friend and we had 5 totes up and running.  I have no idea how many gallons of water we delivered to jugs and buckets but it was ALOT!

Then thru collaboration with one of our chemical suppliers, we really expanded to a 21,000 gallon tank.  The Chestnut Hill volunteer fire department helped us keep the tanks full at this station, the local hospital, and several shower sites that were set up around the county.


We even got a visit from Dolly herself to inform the community that she was personally donating 1 million dollars and her Dollywood company would also be donating another million.  Morgan Wallen also donated $500K.  My work, Bush Brothers donated food products and allowed many of us employees time to volunteer in this time of need.

I have been blown away by the love and compassion and grit that my fellow mountain folk have demonstrated over the past week.  Donations, volunteers and money are pouring into the region from hard working Americans that want to help!

We have a long road ahead of us here in East TN and Western NC.  Hard times lay ahead and the cleanup will take a long time but we will recover.  Here in our county the water has been restored and it won't be long till it is considered safe to drink.  


Thursday, September 26, 2024

Canopy bubble drilling part 2!

 More canopy bubble drilling today.

Front all drilled.

Back all drilled.

Fitting the side skirts.  


Left side done.  (Side skirts to frame)

Right side done.


Tuesday, September 24, 2024

Canopy bubble drilling!

 Finalized the location of the canopy, taped it down and started drilling it to the frame today.


First I drilled the canopy frame bow in the front per the marked holes.  Must drill at the angle that is perpendicular to where the bubble contacts the bow.

Taped the Poo out of the canopy so it does not move.

Used 1/8" shims at the front to ensure that gap remains constant.

Ensured that the hole is concentric with the shaft.


And started drilling with the plexi drill.  Front to back and side to side.


Stopped for today because I did not want to push my luck.


Monday, September 23, 2024

Canopy bubble fitting

Now comes the fun stuff of working with the canopy bubble.  Always a risk of cracking one of the most expensive parts of the kit.  No pressure!

First is to remove about 3" of the protective film around the edges of both sides of the bubble.  Then to tape what remains down so that it is protected as much as possible.

There was a blemish just to the side of the factory cut hole in the bubble.  It kinda looks like that was supposed to be there as an indicator of where they should drill the hole.  Hopefully it is not that far off!

Tape up the side rails to help prevent scratches.

This tape gets layed out but not pressed on to help indicate where the canopy contacts the frame.
Tape up the canopy latch shaft hole that sticks up to help prevent scratches.

I noticed that the copilot side was sitting on the frame and it needs a minimum 1/8" gap.  First cut was completed.

The front corners needed a little trimming to allow them to clear the frame.  Easy peasy,

Then it was time to located the canopy and triple check all the measurements.


Ensuring the 1/8" gap between the front of the bubble and the top fwd skin.


Marking the latch hole to be able to make it more concentric with the shaft.

I made a Z shaped tool from a vinyl coated coat hanger that I used to press the blue tape down to the frame in the front.  I stuck it under the bubble between it and the frame and worked it across the hoop.  Worked great!  I then marked the tape per the KAI's.


Wednesday, September 18, 2024

Canopy latch and handle

Worked on the canopy latch handle today.

First is match drilling the exterior handle to the interior handle shaft.  Be careful to drill it straight.

Then the exterior handle gets drilled deeper for the tapped threads.

Then the first half of the handle gets enlarged for the screw clearance.

Then the shaft gets enlarged as well.
Then the exterior handle is tapped for the screw that holds it onto the shaft.  I can't believe this one little screw is all that keeps the handle from falling out and if it does, the canopy will be free to pop open in flight.  I don't worry about the screw shearing off but it is possible for it to vibrate out.  There is no mention of using loctite on this screw but you can be sure I will be.

Next the interior handle has to be rounded over in a few places. 


Then this spacer has to be installed onto the shaft.  It must be chamfered to allow it to clear the weld bead on the handle.


The fit was so tight that I was not able to just slide the spacer down the shaft.  I had to make a tool to help push it without damage.  I just drilled a hole in a piece of hardwood that was just big enough for the shaft.  Worked well.

Then they have you clamp the frame to the rollbar using the wood spacers that were included in the kit.

And they have you check that the latch interfaces properly with the latch block.


Monday, September 16, 2024

Canopy frame part 5

More work on the canopy frame.

The angle that eventually helps to hold the canopy bubble to the frame must be fluted to match the shape of the frame. It takes some serious fluting of these parts to get them into the right shape.  Just go slow and do a little at a time until it is correct.


Then they have to be match drilled to the frame.  The inside edge sits flush with the inside edge of the canopy frame.

TADA! I then did the other side.